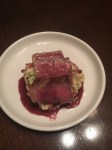
So as I mentioned in my last post, I bought a sous-vide precision circulator a few weeks ago. This was after spending Thanksgiving in Arkansas with good friends. I was cooking up a storm with my friend Vince, Chef/Owner of … Continue reading
So as I mentioned in my last post, I bought a sous-vide precision circulator a few weeks ago. This was after spending Thanksgiving in Arkansas with good friends. I was cooking up a storm with my friend Vince, Chef/Owner of … Continue reading

As a die-hard foodie, the Holidays always bring about the mixed emotions of excitement and anxiety. I love to cook the traditional dishes and bake the heartwarming cookies of my childhood. They are filled with memories and evoke feelings of … Continue reading
Thanksgiving dinner is one of my FAVORITE meals to cook. The more people the merrier in my opinion. Every family has traditional dishes that they grew up with or discovered later in life when dinning with a new family or group of friends. Everyone I talk to has very strong opinions on whether you should stuff the Turkey or cook the stuffing outside the Turkey and baste it with the turkey drippings. There are all kinds of cooking and food science reasons to stay away from stuffing the bird and roasting it but tradition is strong and ingrained in most of us. I say, do what you want to do, just know the risks and plan accordingly.
One of the dishes that I cannot live without at Holiday time is Scalloped Corn. My mother has prepared this corn dish for Thanksgiving and Christmas for as long as I can remember. It’s a recipe out of the Betty Crocker cookbook lovingly modified over the years by both my mother and myself. I have introduced it to many people as either a guest at their home or to mine for the holidays – usually to rave reviews.
It is basically corn in a flavored béchamel sauce (white sauce) with some egg thrown in for good measure. This heavenly mixture is poured into the baking dish of your choice and covered with buttered cracker crumbs then “baked at 350 ‘til brown and bubbly” (one of my favorite lines from the movie Steel Magnolias). The result is a rich, creamy, luscious flavor sensation that is a great side dish for any holiday meal. It’s even better the next day when you make your huge plate of leftover bliss! I usually triple the recipe and bake it in a 9 X 13 dish. My mom always believed the more cracker crumb topping the better so she would find the largest shallow baking dish she had to maximize the topping space. However you do it, make a lot! You want to have this for leftover time!
Enjoy!!
Scalloped Corn
Based on recipe from The Betty Crocker Cookbook
4 ears fresh corn *
½ small onion, chopped (about 1/4 cup)
1/2 small red bell pepper, chopped (I usually use red pepper)
2 tablespoons unsalted butler
2 tablespoons flour
1 teaspoon salt
1/2 teaspoon paprika
1/4 teaspoon dry mustard
Dash of pepper
3/4 cup milk
1 egg, slightly beaten
1/3 cup cracker crumbs
1 tablespoon unsalted butter, melted
Boil or roast the fresh corn on the cob. Cut enough kernels from cob to measure 2 cups.
In a large fry pan with high sides, sauté onion and red bell pepper in 2 tablespoons unsalted butter until onion is tender; remove from heat. Stir in flour, salt, paprika, mustard and pepper. Cook over low heat, stirring constantly, until mixture is bubbly; remove from heat. Stir in milk gradually. Heat to boiling, stirring constantly. Boil and stir 1 minute. Stir in corn and egg. Pour into ungreased I-quart casserole.
Mix crumbs and 1 tablespoon melted butter; sprinkle over corn. Bake uncovered in 350° oven until bubbly, 30 to 35 minutes.
*1 package (10 ounces) frozen whole kernel corn, cooked and drained, or 1 can (16 ounces) whole kernel corn, drained, can be substituted for the fresh corn.
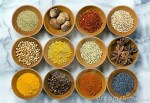
As I was writing my post on using fresh vs. dried herbs I also reflected on the transition I’ve made to fresh grinding certain spices as opposed to using the pre-ground spice bottle. I like to grate nutmeg and cinnamon … Continue reading

For many years I used dried herbs and spices in my cooking. In fact my spice cabinet is chock full of large and small containers of herbs and spices from the plastic, to glass, and even the rectangular metal containers. All these different styles of containers make it challenging to organize and find what I’m looking for. The other day, I needed some cinnamon as I was baking a cake. Usually the cinnamon is right in the front because I use it so often but this time it was buried in the back of my carousel organizer. As I searched through all my spices I realized – in the past 10 years I have made a significant switch from using dried herbs to using fresh. Many of the dried herbs I have probably need to be pitched because they’re old and I haven’t used them in a looooooong time. I think I’ve had the two containers of garlic powder for 15 years now – gotta go!
Many TV chefs have led the way in using fresh vs. dried herbs. More recent recipes call for fresh herbs instead of dried. Because of this trend more types of fresh herbs are readily available in the produce section of your grocery stores. With my weekly CSA share, I always receive one or two fresh herbs and these are even better as they were picked that day.
To my taste buds, using fresh herbs makes a significant improvement in what I’m cooking. I love to stuff the cavity of a chicken I’m about to roast with a big handful of fresh thyme or rosemary. This perfumes the meat of chicken beautifully with the earthy and delish flavors of the herb. The aroma of fresh basil in the kitchen always makes me smile. And using it in my cooking makes my taste buds sing.
Of course in a pinch, I’ll use dried herbs if I must, especially if I can’t find fresh herbs in the store. To avoid this, I’ve started growing my own herbs. Admittedly I’m not the best gardener around but I find it quite easy to keep a few flowerpots with basil, thyme, chives, rosemary, cilantro and parsley in the back yard. I feel such a sense of accomplishment when I can go out back and snip off some fresh herbs for my cooking. And it’s so convenient too!
Of course, as with most things, I have an exception. I have also grown fresh oregano but I find it to be so strong fresh that I prefer the dried herb in this one case. Everyone has their own taste preferences and for me, I have found dried oregano works better.
One of the challenges I had when I first started using fresh herbs was converting my older recipes that called for dried herbs. I have included some tips below to help you if you’d prefer to make the switch.
Tips on using fresh vs. dried herbs:
Hope these tips help. You will make a significant improvement in your cooking when you start using fresh herbs. People often ask me, “What did you put in this? It tastes so good!” One of the main reasons – I use fresh herbs and the freshest ingredients I can find.
Try it – you’ll like it!
As summertime kicks into full gear, it marks the migration from the kitchen to the grill. Who wants to heat up the house with a hot stove!
One of my favorite things to do on the grill is fresh vegetables. Now that many are coming into season it’s time for making the most of them on the grill! I got quite a few zucchini in my last two CSA shares and there is nothing better than slicing them on the diagonally into thick pieces, rubbing them with some olive oil, and throwing them on the grill. My other favorites are bell peppers, eggplant, asparagus, onions, mushrooms and even tomatoes.
 Once I cut them into grill ready pieces, I take a sheet or two of paper towel and my favorite olive oil and rub them all down. Not too much olive oil mind you, you don’t want flare ups. But enough to get grill marks and add that delish flavor (plus it keeps them from sticking to the grill!). I grill them to the color and texture I like then remove them from the grill into a bowl. I add salt and pepper and – balsamic vinegar to them. It couldn’t taste better! I sometimes add a little more olive oil and if I’m feeling really crazy, I sprinkle them with fresh ground parmesan cheese. Oh la la la la as they say in Paris. Tres magnifique!!!
These veggies make the perfect side dish for any meal. The rainbow of colors and the flavors create a visually exciting dish that people can’t wait to eat. And the pieces are big enough that if there is a particular vegetable that someone doesn’t like, they can pick around it.
Another great example is simple is delicious! AND the fresher the vegetables the better. When using few ingredients, use the best you can find. It makes a huge difference!
I can’t wait for corn to come into season!!!
Bon appétit!
The summer brings one of my favorite string of events – the cultural festivals. Here in Wilmington, DE, the season kicks off today with The Greek Festival – OPA! The Greek Festival is my absolute favorite of them all. Not only because I love Greece and have fond childhood memories of visiting as a teenager, I LOVE Greek food and The Greek Festival has it in abundance.

For whatever reason, Wilmington, DE, does not have many Greek or Middle Eastern restaurants. Some have come and gone but by and large, there is no place to go on a regular basis and get a Gyro. Enter the Greek Festival! Although all of my favorite Greek foods are available at the Greek Festival from Spanakopita, Souvlaki, and Pastitsio, the item I look most forward to is the Gyro. And I think most of Wilmington agrees with me because the line for the Gyro stand is always the longest. They are that good! From the salty, juicy lamb and beef, the freshness that the tomato and onion adds, to the tangy Tzatziki sauce, it is a taste sensation I look forward to all year!

Me diving into a Gyro at the 2011 Greek Festival
My friends and I get there as early as we can to beat the line – if possible. We get our food and beverages, then we gather on the steps of the church to eat our fantastic treats. The other thing I love about this festival is that you see people there you haven’t seen in forever. Sitting on those church steps, right near the entrance of the festival, the whole world passes you by. You see people reconnecting and catching up, eating, drinking, and dancing together. It is another great example of how food brings people together.
I would be remiss if I didn’t mention the pastries! All the favorites, including baklava, are there and they even sell them in bulk so you can take them home and enjoy them for as long as they’ll last.
I find endless inspiration in the food that I experience at these cultural festivals. I grew up overseas and was exposed to many different national dishes in my formative years. These festivals bring back wonderful childhood memories and also inspire me to add different flavors to my cooking. Fusion of cultural dishes has become more and more popular over the last decade as chefs travel to different countries and bring flavors back to their regional dishes. I love the opportunity these summer festivals provide to do the same thing without having to travel too far.
Next festival on the heels of the Greek Festival – The Italian Festival – bellissimo!
Enjoy your local summer festivals!
Since my return to the US from my all too short stay in Paris I have been obsessed with the freshness of the ingredients I’m cooking with and eating. One of the many aspects of eating in Paris is the culture of shopping daily at the open markets. Buying the food directly from the farm as fresh as it could possibly be purchased. This not only makes a huge difference in flavor, it also makes a huge difference in nutrition.

Farm Fresh
Fruits and vegetables that are purchased in US grocery stores are minimally a week old. This of course depends on how far the food has to travel and how long it is kept in cold storage. In that time we are lucky of 40% of the nutrients from that food is still there. Many of these fruits and vegetables are grown by single source farmers, meaning farmers that only grow one crop – like corn, a practice that can render the soil deficient of nutrients necessary for healthy plants. This means that it becomes necessary to use chemical fertilizers and pesticides. The bottom line is that our mega farms are producing food that is less nutritious and has more chemicals being used in its production.
The good news is there are more and more restaurants that are adopting the Farm to Table principle. Chefs working with local farmers to get the products they would like to cook with in their restaurants. This not only includes produce; it includes dairy, grains, and livestock. It is exciting to see farmers and chefs working together and talking to each other about how food is grown or how livestock is fed. The farmers know what the local chefs will buy and therefore are more willing to adopt organic practices to produce more wholesome food. More nutritious and with no chemicals! Imagine how much better it tastes. There is a noticeable difference AND it’s better for you!
Another exciting trend, one which I have recently joined, is people buying CSA (Community Supported Agriculture) shares from local farmers. This is an exciting win-win concept where people in the community buy fresh fruits and vegetables for the season from a local farmer in advance. As an individual or family, you are guaranteed fresh and organic fruits and vegetables weekly and the farmer knows how much to plant and grow to support the community it serves. Win-win!

A Caprese Salad I made with fresh heirloom tomatoes, fresh buffalo mozzarella, and basil.
As a person who loves to cook this has been an exciting way to challenge myself. Each week I get a large bag full of fresh veggies, herbs, and fruits. I never now exactly what I will be getting so when I get a pound of Swiss Chard for example, something I haven’t cooked with before, I get to explore websites for recipes and try things I have never cooked before. Of course if there is a vegetable or fruit I don’t care for it can make a lovely gift to a friend or neighbor but so far I’ve used everything I have received.
The farm where I purchased my share here in Delaware, Highland Orchards, also has their own farm fresh eggs. The difference in the taste and freshness of these eggs is very noticeable to me both in eating them for breakfast or using them in my baking.
Another added benefit is that these community-supported farmers are growing many different crops on their land. Through crop rotation, this also ensures that the soil is abundant with nutrients that the plants need to grow in a healthy way. This means that chemicals aren’t necessary because the plants are healthy enough to fight of disease and pests and are in turn more nutritious for us when we eat them.
One of the basic principles of good cooking is to use the freshest and best quality ingredients you can find. Buying fresh ingredients from local farmers is one of the best ways to accomplish that. As our grocery stores have made many fruits and vegetable available all year long, we have moved away from the concept of seasonal cooking. Cooking with an ingredient when it is most fresh and ripe also makes a huge difference in flavor and nutrition.
In fact there are produce items, such as tomatoes, that are available in grocery stores all year round. There are friends of mine that don’t even know when tomatoes are naturally in season. I don’t mean that tomatoes shouldn’t be available all year round. In many cases, I’m glad they are. But there is a HUGE difference in flavor when the delicious Jersey tomatoes are in season and purchased fresh from the farmer and buying the “tomato-on-the-vine” in the grocery store.
I learned a great deal from watching several documentary films, most of which are available to stream on Netflix. Documentaries such as Food Matters, Fat Sick and Nearly Dead, The Gerson Miracle, and Food Inc. have taught me a great deal about the food we are eating and the nutritional value of that food. I recommend checking them out for further information.
In the meantime, check out your local farmer’s markets and do a Google search for CSA (Community Supported Agriculture) in your area. It will make a huge difference in your cooking and your health!
A bientôt mes amis!
I have several friends who have bought new homes recently. Because they all know how I love to spend time in the kitchen, I have received several requests for suggestions on how to set up their new kitchens.
I myself have moved many times in my life; sometimes within the same town and sometimes clear across the country. The room that takes me longest to pack and unpack is… the kitchen. I do have an obsession with cooking tools and equipment. I freely admit it. I also have a weakness for pottery – especially bowls and serving dishes. So I am part of the problem in terms of the amount of stuff I have to move. That being said, each time I have moved, I try and create a more efficient kitchen.
My best advice is to make it as simple as possible. I choose the cabinet closest to the refrigerator to place my drinking glasses. I choose the cupboard closest to the table to put my dishes and the drawer under it for my silverware. Spices go in the cabinet above the stove along with my oils and vinegars for easy access. I always use the top drawer right next to the stove to put my oven mitts and potholders. I choose the cabinet above the workspace where I’ll be doing most baking to locate my flour, sugar, and other baking items. Coffee mugs near the coffee maker or visa versa. The less time you have to run around the kitchen to get the things you need, the easier your life will be. Make sense?
These suggestions may sound obvious but I can’t tell you the number of kitchens I have cooked in (at other people’s homes) where the oven mitts are on the opposite side of the kitchen than the oven. The glasses located on the opposite side of where the refrigerator is in the room. Now I have certainly been in the situation where I was trying to get things unpacked and put away as quickly as possible. So I didn’t think about where I was putting things or thought I would just change it later. I don’t know about you but once it’s all put away to rearrange it is an overwhelming task.
Now if you have the opportunity to re-design your kitchen, or your building your home and can decide where all the major appliances are placed, the first thing to keep in mind is the triangulation of the stove top, the sink, and the refrigerator. Those are the three major items that a cook uses in the kitchen so to have them conveniently located near each other is ideal. Of course having the dishwasher near the sink is important. Again I think the best advice is to keep it simple. Think about how to make your life as easy as possible in terms of having the things located in a way that makes it easy for you to cook. Keep in mind that whenever there is a social gathering people LOVE to be in the kitchen. So make a space for them to hang out and keep you company with out being in your way when you’re cooking. Better yet, have a space for them to chop or help without being in the flow of your workspace. A second sink is always a plus! Two dishwashers is a dream!
I love a good aesthetic as much as the next person. My perspective is to prioritize function in the kitchen and aesthetic in the dinning room. A balance of both is great but many times one is forced to prioritize one over the other.
So the bottom line – Keep it Simple! Take a moment to think about HOW you will use your kitchen based on where your appliances and sink(s) are located and arrange your kitchen stuff in the most convenient way. Some people like to draw it out, some people like to take post-it notes and put them around the kitchen before they start unpacking, whatever works for you it’s worth the extra step to make your life easier.
Enjoy!

Studying at Le Cordon Bleu Paris
Cooking is one of my life long passions. I find that it feeds both my artistic soul as well as my scientific interests. The art of cooking, in creating a masterpiece that is both visually and gastronomically appealing is a thrill. At the same time, one cannot be completely successful in the kitchen if the scientific aspect of cooking is not understood. The way leaveners are activated, the smoke point of oils, the way flour can be overworked to develop too much gluten, the point at which whipping cream becomes butter, all these things and many more must be understood and practiced in order to produce the best quality meal as possible.
My passion for cooking first came to me from my mother. She was a home economics teacher and a fabulous cook. At age 7, my family moved overseas to Tripoli, Libya, where my parents taught in the American school. Living in a place where there are no “fast food” establishments or even a pizzeria, my mother was left with the daunting task of having to prepare all of our meals. I loved watching her in the kitchen, the way she improvised when certain ingredients were not readily available to us in the stores or when she just didn’t have it in the house. My mother saw recipes as a starting point from which to launch her creativity, a suggestion of how to prepare the dish that she would then make her own. On the occasions when we would travel outside of Libya and go to delicious restaurants, she would study the meals we had, try to determine all the ingredients, so she could recreate them once we were home and couldn’t return to the establishment easily to have the dish again. Our shopping trips would always include the exciting adventure of trying to find items like oven proof bowls to make French Onion Soup or heatproof glasses to recreate Irish Coffee. I know it was an extra burden on my mom to cook ALL the time for us, but she made it fun and delicious. And best of all, she taught me how to cook so I could help her – a task that I loved to do and have all my life. I wasn’t so crazy about the cleaning up part, but you have to take the good with the bad. Thank goodness for dishwashers!
One of the best things about growing up overseas was my exposure to so many different types of cuisine. I can remember my first taste of wienerschnitzel in Germany, the first time I tried Calamari in Greece (I thought they were onion rings), and the first time I sipped French Onion Soup in Paris. These experiences helped to shape my palette and my appreciation of all types of food and preparation methods. It was a priceless education, which I feel lucky to have had.
The great thing about this passion is that I never stop learning more about it. Through college as a Food and Hotel major I learned to hone my technique and about cooking for large groups of people. As a breakfast Chef in a restaurant in college I learned the pace of a professional kitchen and getting orders out timely, hot, and delicious. I’ve had side businesses such as catering and cake decorating and through it all I learn more and more. I’ve been inspired by teachers, my friends, meals I’ve had, professional Chefs and TV personalities like Ina Garten, Tyler Florence and the infamous Julia Child.
The all time pursuit of my dreams has been this trip to Paris and taking classes at Le Cordon Bleu. I have learned so much in the past 5 weeks that I can’t even put it into words. I definitely want to return for more. Not only have the classes been a learning experience but the restaurants, cafes, patisseries, and the boulangeries of Paris have inspired and educated me. It has been so exciting to see the items that we learn to cook in class in the pastry shops and I always think to myself, I can make that now!
Cooking is a personal thing for each person. Some people I’ve met find it difficult, some find it a chore or task that must be done on a daily basis, others see it as a hobby or a profession. Whatever cooking means to you, I hope you can find the joy in it, whether you think you’re good at it or not. I have a friend who LOVES to sing. She’s not very good at it and she knows it’s not her strong suit. She always apologetic about singing around me but I don’t care that she’s not a very good singer. I love to see the joy on her face and the happiness it brings her when she sings. Learning to cook can bring the same joy to a person and it’s my goal on this blog to help you learn how to cook and to have a good time at it!
In honor of National Chocolate Covered Peanut day, let’s make something easy and Delish!
Chocolate Covered Peanuts
1 bag of Chocolate Chips (12 oz)
1 bag of Butterscotch Chips (6 oz)
1 heaping tablespoon peanut butter (creamy or chunky – it’s your creative choice)
1 pound Peanuts (or cashews, almonds, whatever you like)
Pour Chocolate and Butterscotch chips into a heat proof bowl. Melt chips either in microwave or over a double boiler. When chocolate mixture is completely melted, remove from heat and stir in the peanut butter and the nuts. Spoon out chocolate covered nuts onto waxed paper or parchment paper. Let cool till set and hardened. Enjoy!
A bientôt mes amis!
